| Delta Temple | ||
|---|---|---|
 Final Room, with Delta Champion Talde | ||
| Information | ||
| Special features |
Victini & Jirachi Forme Changer, | |
| Items |
Charcoal, TwistedSpoon | |
| Connected areas | ||
| Location | ||
 |
||
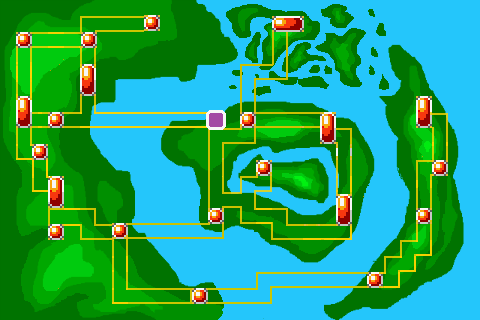
The Delta Temple is a location in Yangtze Town that is only accessible by using Tesseract on a grassy patch on the beach and then surfing to the tower that appears out in the sea. It is filled with trainers known as Delta Priests, never before seen Delta Pokémon, and other strange surprises. It is also a good place to train before entering the fifth Sigil Hall.


Walkthrough[]
The Delta Temple is a very large area to navigate through and may require several trips to the Pokémon Center due to the sheer number of Pokémon and trainers inside. It is split into five different chambers which all contain their own leader as well as a final battle at the very end of the temple with a trainer known as the Delta Champion. All Delta Leaders will offer rematches after they've been defeated.
However, when the trainer first enters the temple they will be faced with five different cave entrances which lead to four different chambers. The Mind Chamber is currently blocked off to the northwest and can only be accessed after clearing out the other three chambers. The cave to the east leads to the Ocean Chamber, the two cave entrances to the northeast both lead to different parts of the Forest Chamber, and the western cave contains the Inferno Chamber. All three of these areas can be completed in any order desired in order to open the pathway to the Mind Chamber.
The Inferno Chamber consists of an island in the middle of a lake of lava with a button which alters a bridge's direction and allows the player to gain access to different sections of the chamber using the bridge. To continue west over to Delta Leader Neal, the player needs to solve two simple gem puzzles which require the player to try twisting the gems in different orders until all of them are in the correct position. The player must fight their way through several trainers in order to reach these puzzles.
TIP: As almost every Pokémon here has the ability Flame Body, methods to cure burns or moves that do not contact the opponent are advised.
The Forest Chamber forces the player to go through a large hedge maze filled with Delta Priests waiting for the player to walk by and battle them. There are two separate ways that the player can enter this area. The doorway to the left causes the player to enter the Forest Chamber from above while the doorway to the right causes the player to enter from below. Generally, while the path from below pairs the player against more trainers, the path from above has more confusing pathways to navigate through. When entering the path from below and encountering a fork in the path, the dead-ends that branch off of the forks in the path are much shorter and take far less time to turn around and then enter the correct pathway. In the center of the maze the player will find Delta Leader Adam.
The Ocean Chamber consists of two different floors. The first floor at a first glance has a large but simple water maze which eventually leads the player over to a level 50 Delta Milotic in the northeastern corner. However, Delta Leader Katie is inaccessible. So in order to reach them the player must head down to the lower floor and slide across the ice while battling Delta Priests to remove the barriers of ice along the way. Once all of the barriers have been removed the player will then gain access to a switch which when pressed will open up the pathway to Delta Leader Katie on the first floor.
TIP: Make sure to catch Delta Milotic before pressing the switch on the lower floor, as it will permanently disappear once the switch has been activated. You are still able to catch Delta Milotic in Route 321 at the same level.
With the entrance to the Mind Chamber now accessible through the first room, the player is now ready to head deeper into the Delta Temple. The Mind Chamber is composed of a teleportation puzzle involving pads on the floor that the player must use to find out the order which will lead them to Delta Leader Bruce. The most efficient path to take in order to reach Delta Leader Bruce can be found by taking the teleportation pads in the following order from the entrance of the Mind Chamber: Right, Left, and then Down. Delta Leader Bruce will then appear directly above the player; defeating him then allows the player to access the Iron Chamber.
NOTE: After Delta Leader Bruce is defeated the first time, if you run into the upper leftmost corner you activate Bruce again and the player will be stuck in an endless loop of fighting Bruce.
Inside of the Iron Chamber the player will be presented with three different sets of arrows, one of which is actually facing away from the player. As the other two are inaccessible, the player should walk onto the arrows directly in front of them. The actual puzzle here is far from difficult and only requires the player to flip the switches that they encounter while sliding around the room, which then cause some of the arrows to change direction. This will eventually reveal a path which takes the player straight upward to reach Delta Leader David. After defeating David the player will gain access to the final room of the Delta Temple where Delta Champion Talde awaits them.
In the final room the player will find no puzzles, no wild Pokémon, and no lesser trainers. The only obstacle in this room to overcome is Talde himself. As opposed to the previous Delta Leaders, the Delta Champion uses an entire team of Delta Pokémon, most of which cannot be obtained at any point in the game. If the player needs to heal at the Pokémon Center before this battle, they may walk out the door at the back of the room to exit the Delta Temple.
With Talde defeated, he will reward the player with the ability to impart the power of the Delta into the player's Victini or Jirachi. See the section below for details.
Delta Jirachi & Delta Victini[]

Delta Jirachi

Delta Victini
As stated above, defeating Delta Champion Talde allows the player to convert a Jirachi or Victini in his or her party into their Delta Formes. However, as this is a Forme change and not a species change, this sets Jirachi and Victini completely apart from all other Delta Pokémon.
If the player chooses to transform his or her Jirachi from its Sealed Forme into its Delta Forme then Jirachi will become a dual-type Steel/Fairy Pokémon and will have the opportunity to learn Fairy Force. It retains its original base stats and learnsets, excluding Fairy Force.
If the player chooses to transform his or her Victini from its Sealed Forme into its Delta Forme then Victini will become a dual-type Fire/Fairy Pokémon and will have the opportunity to learn Fairy Fyre. It retains its original base stats and learnsets, excluding Fairy Fyre.
Talking to Delta Champion Talde again while Jirachi or Victini are in the party and in their Delta Formes will allow the player to revert them back to their Sealed Formes. Doing so will delete Fairy Force/Fairy Fyre and return them to their original typings.
Obtainable Items[]
| Item | Location |
|---|---|
| Found in the Inferno Chamber by heading north up the direction-changing bridge and then walking to the left at the end of the bridge | |
| Found in the Mind Chamber by taking the left-sided teleportation pads three times in a row from the beginning |
Boss Battles[]
Delta Leader Neal[]

| Pokémon | Level | Moves | Item | |||
|---|---|---|---|---|---|---|
| 108 | ExtremeSpeed | Roar | Fire Fang | Odor Sleuth | None | |
| 109 | Double-Edge | Inferno | Rollout | Eruption | None | |
| 109 | Bug Buzz | Rage Powder | Hurricane | Fiery Dance | None | |
| 110 | Fire Blast | Psyshock | Calm Mind | Psychic | ||
| 108 | Inferno | Shell Smash | Heat Wave | Flail | None | |
| Reward: | ||||||
Delta Leader Adam[]
| Pokémon | Level | Moves | ||||
|---|---|---|---|---|---|---|
| 109 | Double Hit | Air Slash | Swords Dance | Feint | ||
| 108 | Psyshock | Egg Bomb | Leaf Storm | Wood Hammer | ||
| 108 | Bug Buzz | Power Swap | Final Gambit | Recover | ||
| 109 | Detect | False Swipe | Slam | Leaf Storm | ||
| 110 | Guillotine | Superpower | Swords Dance | Thrash | ||
| Reward: | ||||||
Delta Leader Katie[]
| Pokémon | Level | Moves | ||||
|---|---|---|---|---|---|---|
| 108 | Safeguard | Sheer Cold | Brine | Hydro Pump | ||
| 108 | Aqua Tail | Swords Dance | Retaliate | Hydro Pump | ||
| 109 | Rain Dance | Dragon Dance | Hydro Pump | Hyper Beam | ||
| 110 | Overheat | Safeguard | Attract | Moonblast | ||
| 109 | Discharge | Charge | Aqua Ring | Hydro Pump | ||
| Reward: | ||||||
Delta Leader Bruce[]
| Pokémon | Level | Moves | ||||
|---|---|---|---|---|---|---|
| 109 | Ominous Wind | Guard Swap | Power Swap | Psychic | ||
| 108 | Air Slash | Psychic | Cosmic Power | Sky Attack | ||
| 109 | Sandstorm | Heal Block | Earth Power | Explosion | ||
| 108 | Calm Mind | Future Sight | Psychic | Trick | ||
| 110 | Bullet Punch | Shift Gear | Metal Sound | Iron Tail | ||
| Reward: | ||||||
Delta Leader David[]
| Pokémon | Level | Moves | Item | |||
|---|---|---|---|---|---|---|
| 109 | Shadow Claw | Sucker Punch | Ancient Power | Synchronoise | None | |
| 109 | Double-Edge | Dig | Stone Edge | Sandstorm | None | |
| 108 | ExtremeSpeed | Aura Sphere | Dragon Pulse | Close Combat | ||
| 108 | Aqua Tail | Trick | Shadow Claw | Return | ||
| 110 | Iron Tail | Swords Dance | Taunt | Meteor Mash | None | |
| Reward: | ||||||
Delta Champion Talde[]

| Pokémon | Level | Moves | Item | ||||
|---|---|---|---|---|---|---|---|
| 115 | Head Smash | Earthquake | Flare Blitz | Screech | |||
| 115 | Body Slam | Wood Hammer | Curse | Leech Seed | |||
| 115 | Thunder | Flash Cannon | Metal Sound | Bullet Punch | None | ||
| 115 | Hydro Pump | Iron Head | Focus Blast | Skull Bash | None | ||
| 115 | Thunder | Bullet Punch | Iron Tail | Flare Blitz | None | ||
| Reward: | |||||||
Trainers[]
Inferno Chamber[]
Southern Path[]
| Trainer | Pokémon | Level | |
|---|---|---|---|
Delta Priestess Xenura |
106 | ||
| 107 | |||
| Rewards: | |||
| Trainer | Pokémon | Level | |
|---|---|---|---|
Delta Priest Quezaln |
106 | ||
| 107 | |||
| Rewards: | |||
| Trainer | Pokémon | Level | |
|---|---|---|---|
Delta Priestess Nraiza |
106 | ||
| 107 | |||
| 106 | |||
| Rewards: | |||
| Trainer | Pokémon | Level | |
|---|---|---|---|
Delta Priestess Solgi |
105 | ||
| 106 | |||
| 107 | |||
| Rewards: | |||
| Trainer | Pokémon | Level | |
|---|---|---|---|
Delta Priest Moxx |
105 | ||
| 106 | |||
| 107 | |||
| Rewards: | |||
| Trainer | Pokémon | Level | |
|---|---|---|---|
Delta Priestess Nini |
105 | ||
| 107 | |||
| 105 | |||
| Rewards: | |||
Northern Path[]
| Trainer | Pokémon | Level | |
|---|---|---|---|
Delta Priest Xanorith |
106 | ||
| 107 | |||
| Rewards: | |||
| Trainer | Pokémon | Level | |
|---|---|---|---|
Delta Priest Querzath |
106 | ||
| 107 | |||
| Rewards: | |||
| Trainer | Pokémon | Level | |
|---|---|---|---|
Delta Priestess Mazora |
105 | ||
| 107 | |||
| 107 | |||
| Rewards: | |||
| Trainer | Pokémon | Level | |
|---|---|---|---|
Delta Priest Kozaxor |
106 | ||
| 106 | |||
| 106 | |||
| Rewards: | |||
| Trainer | Pokémon | Level | |
|---|---|---|---|
Delta Priestess Sonoria |
105 | ||
| 106 | |||
| 107 | |||
| Rewards: | |||
| Trainer | Pokémon | Level | |
|---|---|---|---|
Delta Priest Kor |
105 | ||
| 107 | |||
| 107 | |||
| Rewards: | |||
Western Path[]
| Trainer | Pokémon | Level | |
|---|---|---|---|
Delta Priestess Z |
106 | ||
| 107 | |||
| 105 | |||
| Rewards: | |||
Forest Chamber[]
Path from Below[]
| Trainer | Pokémon | Level | |
|---|---|---|---|
Delta Priestess Fangitha |
105 | ||
| 105 | |||
| 107 | |||
| Rewards: | |||
| Trainer | Pokémon | Level | |
|---|---|---|---|
Delta Priest Forth |
105 | ||
| 105 | |||
| 107 | |||
| Rewards: | |||
| Trainer | Pokémon | Level | |
|---|---|---|---|
Delta Priest Traena |
105 | ||
| 105 | |||
| 107 | |||
| Rewards: | |||
| Trainer | Pokémon | Level | |
|---|---|---|---|
Delta Priestess Saram |
106 | ||
| 106 | |||
| 107 | |||
| Rewards: | |||
| Trainer | Pokémon | Level | |
|---|---|---|---|
Delta Priest E |
105 | ||
| 106 | |||
| 107 | |||
| Rewards: | |||
| Trainer | Pokémon | Level | |
|---|---|---|---|
Delta Priestess F |
105 | ||
| 106 | |||
| 107 | |||
| Rewards: | |||
| Trainer | Pokémon | Level | |
|---|---|---|---|
Delta Priestess G |
105 | ||
| 106 | |||
| 107 | |||
| Rewards: | |||
| Trainer | Pokémon | Level | |
|---|---|---|---|
Delta Priest H |
105 | ||
| 106 | |||
| 107 | |||
| Rewards: | |||
Path from Above[]
| Trainer | Pokémon | Level | |
|---|---|---|---|
Delta Priest Faul |
106 | ||
| 106 | |||
| 106 | |||
| Rewards: | |||
| Trainer | Pokémon | Level | |
|---|---|---|---|
Delta Priestess Golty |
105 | ||
| 107 | |||
| 105 | |||
| Rewards: | |||
| Trainer | Pokémon | Level | |
|---|---|---|---|
Delta Priest Hazor |
105 | ||
| 106 | |||
| 106 | |||
| Rewards: | |||
| Trainer | Pokémon | Level | |
|---|---|---|---|
Delta Priestess Arone |
105 | ||
| 106 | |||
| 106 | |||
| Rewards: | |||
Ocean Chamber[]
Lower Floor[]
| Trainer | Pokémon | Level | |
|---|---|---|---|
Delta Priestess Tigara |
105 | ||
| 107 | |||
| 107 | |||
| Rewards: | |||
| Trainer | Pokémon | Level | |
|---|---|---|---|
Delta Priestess Melody |
105 | ||
| 107 | |||
| 107 | |||
| Rewards: | |||
| Trainer | Pokémon | Level | |
|---|---|---|---|
Delta Priest Maxim |
105 | ||
| 105 | |||
| 107 | |||
| Rewards: | |||
| Trainer | Pokémon | Level | |
|---|---|---|---|
Delta Priest Somra |
105 | ||
| 105 | |||
| 107 | |||
| Rewards: | |||
| Trainer | Pokémon | Level | |
|---|---|---|---|
Delta Priest Deltho |
106 | ||
| 107 | |||
| 105 | |||
| Rewards: | |||
| Trainer | Pokémon | Level | |
|---|---|---|---|
Delta Priestess Shama |
106 | ||
| 107 | |||
| 105 | |||
| Rewards: | |||
Upper Floor[]
| Trainer | Pokémon | Level | |
|---|---|---|---|
Delta Priest Fomoth |
105 | ||
| 107 | |||
| 106 | |||
| 107 | |||
| Rewards: | |||
Mind Chamber[]
| Trainer | Pokémon | Level | |
|---|---|---|---|
Delta Priestess Jiji |
105 | ||
| 105 | |||
| 107 | |||
| Rewards: | |||
| Trainer | Pokémon | Level | |
|---|---|---|---|
Delta Priestess Samella |
105 | ||
| 105 | |||
| 107 | |||
| Rewards: | |||
| Trainer | Pokémon | Level | |
|---|---|---|---|
Delta Priestess Cassandra |
106 | ||
| 106 | |||
| 106 | |||
| Rewards: | |||
| Trainer | Pokémon | Level | |
|---|---|---|---|
Delta Priest Soldier |
105 | ||
| 106 | |||
| 106 | |||
| Rewards: | |||
| Trainer | Pokémon | Level | |
|---|---|---|---|
Delta Priestess Arainoa |
105 | ||
| 105 | |||
| 107 | |||
| Rewards: | |||
| Trainer | Pokémon | Level | |
|---|---|---|---|
Delta Priest Qerno |
105 | ||
| 107 | |||
| 105 | |||
| Rewards: | |||
| Trainer | Pokémon | Level | |
|---|---|---|---|
Delta Priest Urathen |
105 | ||
| 107 | |||
| 105 | |||
| Rewards: | |||
| Trainer | Pokémon | Level | |
|---|---|---|---|
Delta Priest Moltrae |
105 | ||
| 105 | |||
| 106 | |||
| Rewards: | |||
| Trainer | Pokémon | Level | |
|---|---|---|---|
Delta Priestess Sias |
105 | ||
| 105 | |||
| 106 | |||
| Rewards: | |||
| Trainer | Pokémon | Level | |
|---|---|---|---|
Delta Priest Koolpoi |
105 | ||
| 105 | |||
| 105 | |||
| 105 | |||
| 105 | |||
| Rewards: | |||
Iron Chamber[]
| Trainer | Pokémon | Level | |
|---|---|---|---|
Delta Priest Magoria |
105 | ||
| 107 | |||
| 105 | |||
| Rewards: | |||
| Trainer | Pokémon | Level | |
|---|---|---|---|
Delta Priest Mystica |
105 | ||
| 106 | |||
| 106 | |||
| Rewards: | |||
| Trainer | Pokémon | Level | |
|---|---|---|---|
Delta Priestess Sana |
105 | ||
| 105 | |||
| 107 | |||
| Rewards: | |||
| Trainer | Pokémon | Level | |
|---|---|---|---|
Delta Priestess Nora |
105 | ||
| 107 | |||
| 105 | |||
| Rewards: | |||
| Trainer | Pokémon | Level | |
|---|---|---|---|
Delta Priestess Mirana |
105 | ||
| 106 | |||
| 106 | |||
| Rewards: | |||
| Trainer | Pokémon | Level | |
|---|---|---|---|
Delta Priest Jason |
105 | ||
| 107 | |||
| 105 | |||
| Rewards: | |||
| Trainer | Pokémon | Level | |
|---|---|---|---|
Delta Priest Masarie |
105 | ||
| 106 | |||
| 106 | |||
| Rewards: | |||
Encounterable Pokémon[]
| Pokémon | Games | Levels | Chance | |
|---|---|---|---|---|
| Special Pokémon | ||||
| Z | O | 50 | One | |
Trivia[]
The five Unown that Koolpoi use, in order, spell out 'DELTA'.