| Spoiler warning! This article contains spoilers for the game. |
| Kingdom Cabinet | ||
|---|---|---|
| [[|300px]] | ||
| Information | ||
| Special features |
Shadow Pokémon | |
| Items |
TM09 Venoshock, TM54 False Swipe, TM57 Charge Beam, TM77 Psych Up, Crest of Aroma | |
| Connected areas | ||
The Kingdom Cabinet is the final area to be accessed in the Aroma Region and is ultimately where the Aroma Region's storyline ends. It is essentially a 3 large room building with 4 backrooms available for access that are connected with Room 2. It connects with Kingdom City in the entrance to Room 1.
Because there are two entirely separate sequences of events that can occur here depending on if you side with Magma/Aqua or Cipher, the contents of this page will be separated into two major sections to reflect this.
Cipher Antagonist Playthrough
Walkthrough
Contents: HELP I HAVE BEEN TRAPPED INSIDE OF A COMPUTER PLEASE HELP
At last, the final objective for the protagonist's journey in the Aroma Region is almost within reach. The player needs to fight their way through the Grunts in the first two rooms before meeting up with Maxie/Archie about halfway into the third and final room. The ally will warn the player about the possibility of needing to face 3 battles in a row, which the player would do well to use that opportunity to heal up if needed. If the player is ready, the final battle(s) will commence.
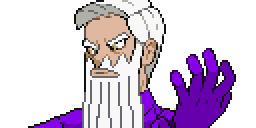
When the player walks further down into the Cabinet, Suzerain (who is now clearly established as King Suzerain) is trapped by Greevil's power. It is revealed that the antagonist is using the Black Orb's evil spirit to corrupt King Suzerain and that it will not be long before it has taken him over completely. Greevil will then battle the player.
Once the player is victorious over the enemy, Greevil will boldly declare that the entire purpose of the battle that just took place was to stall for time as the Black Orb corrupted King Suzerain even further. The Black Orb then fully corrupts King Suzerain, turning him into a shadow form of himself. The Shadow King Suzerain takes this opportunity to kill the player's ally instantly, but opts to face the player in a battle instead of killing them as well. The battle commences, with the fate of the world once again riding on the player's shoulders.
After Shadow King Suzerain has been defeated Suzerain will return to his normal self and inform Greevil that the Fianga City's Police Club will soon arrive to arrest him. Before King Suzerain has a chance to thank the player properly, however, a near-fade to black occurs which details the events that transpired next and which resulted in a happy ending for everyone...except for the player.
The player then reappears in what the Save Menu will reveal to be the Black Orb with their entire party healed. As the player begins to proceed down the dark corridor, several text boxes will appear, presumably spoken from an enemy that cannot be seen. As the protagonist continues, it is made apparent that this enemy is not a stranger at all and instead feels very familiar. At last once the text boxes stop appearing and the enemy is brought into full view, the player is able to realize that the person behind all of the dark schemes in the Aroma Region was none other than the Demon Spirit of Zeus/Odin himself. Unsurprisingly, he challenges the player to a final battle in one last attempt to exact his revenge upon them.
The aftermath of this battle reveals that Zeus/Odin can no longer even bring himself to hate the player and instead appears to finally be able to find peace. The player will then be transported out of the Black Orb to the front of the Kingdom Cabinet in Kingdom City. The player will receive a call from King Suzerain, who asks them to return to his room in the Cabinet to receive the Crest of Aroma.
With this the Aroma storyline finally draws to a close, but the game's storyline has still not yet ended. To unlock the final piece of the storyline the player should start by collecting all of the missed Shadow Pokémon whose locations can be found at the top of the Ladoga Town lighthouse.
Obtainable Items
| Item | Location |
|---|---|
| Obtained in the leftmost room within Room 2 after defeating the final boss | |
| Obtained in the second leftmost room within Room 2 after defeating the final boss | |
| Obtained in the middle room within Room 2 after defeating the final boss | |
| Obtained in the second rightmost room within Room 2 after defeating the final boss | |
| Crest of Aroma | Obtained from King Suzerain after defeating the final boss |
Boss Battles
Cipher Boss Greevil
Contents:

| Pokémon | Level | Moves | Item | |||
|---|---|---|---|---|---|---|
| 92 | Dragon Pulse | Perish Song | Moonblast | Sky Attack | None | |
| 89 | Shadow Sword | Shadow Wrath | Shadow Crush | Shadow Hold | None | |
| 92 | Swords Dance | Sandstorm | Drill Run | Fissure | None | |
| 94 | Heavy Slam | Earthquake | Hammer Arm | Focus Punch | Golurkite | |
| 93 | Bounce | Super Fang | Facade | Earthquake | None | |
| 94 | Fury Cutter | Night Slash | Razor Shell | Cross Chop | None | |
| Reward: | ||||||
Shadow King Suzerain
Contents:

| Pokémon | Level | Moves | Item | |||
|---|---|---|---|---|---|---|
| 93 | Spore | Power Shrine | Special Shrine | Stealth Rock | ||
| 94 | Swords Dance | Sucker Punch | Seed Bomb | Drain Punch | Cacturnite | |
| 90 | Shadow Half | Shadow Sky | Shadow Crush | Shadow Down | None | |
| 90 | Shadow Fire | Shadow Half | Shadow Sky | Shadow Down | None | |
| 90 | Shadow Crush | Shadow Half | Shadow Sky | Shadow Down | None | |
| 94 | Swords Dance | Sacred Sword | Shadow Sneak | King's Shield | Weakness Policy | |
| Reward: | ||||||
Demon Spirit
Contents:

Demon Spirit Zeus (Omicron)
| Pokémon | Level | Moves | Item | |||
|---|---|---|---|---|---|---|
| 90 | Shadow Wave | Shadow Sky | Shadow Down | Shadow Half | None | |
| 95 | Meteor Mash | Pursuit | Earthquake | Hammer Arm | ||
| 95 | Hydro Pump | Volt Switch | Wildfire | Thunder Wave | ||
| 94 | Baton Pass | Substitute | Protect | X-Scissor | ||
| 95 | Sucker Punch | Low Kick | Swords Dance | Iron Head | Bisharpite | |
| 95 | Swords Dance | Sacred Sword | Shadow Sneak | King's Shield | ||
| Reward: | ||||||


Demon Spirit Odin (Zeta)
| Pokémon | Level | Moves | Item | |||
|---|---|---|---|---|---|---|
| 90 | Shadow Wave | Shadow Sky | Shadow Down | Shadow Half | None | |
| 95 | Earthquake | Hammer Arm | Pursuit | Meteor Mash | ||
| 95 | Volt Switch | Hydro Pump | Thunder Wave | Wildfire | ||
| 95 | Sucker Punch | Low Kick | Swords Dance | Iron Head | Bisharpite | |
| 95 | Swords Dance | Sacred Sword | Shadow Sneak | King's Shield | ||
| 94 | Baton Pass | Subtitute | Protect | X Scissor | ||
| Reward: | ||||||
Grunts
Room 1
Contents:
| Trainer | Pokémon | Level | |
|---|---|---|---|
Team Cipher Grunt |
81 | ||
| Rewards: | |||
| Trainer | Pokémon | Level | |
|---|---|---|---|
Team Cipher Grunt |
81 | ||
| 80 | |||
| 81 | |||
| Rewards: | |||
| Trainer | Pokémon | Level | |
|---|---|---|---|
Team Cipher Grunt |
82 | ||
| 82 | |||
| 83 | |||
| 82 | |||
| Rewards: | |||
| Trainer | Pokémon | Level | |
|---|---|---|---|
Team Cipher Grunt |
81 | ||
| Rewards: | |||
Room 2
Contents:
| Trainer | Pokémon | Level | |
|---|---|---|---|
Team Cipher Grunt |
84 | ||
| 83 | |||
| Rewards: | |||
| Trainer | Pokémon | Level | |
|---|---|---|---|
Team Cipher Grunt |
84 | ||
| Rewards: | |||
| Trainer | Pokémon | Level | |
|---|---|---|---|
Team Cipher Grunt |
84 | ||
| 84 | |||
| 85 | |||
| Rewards: | |||
| Trainer | Pokémon | Level | |
|---|---|---|---|
Team Cipher Grunt |
85 | ||
| 85 | |||
| Rewards: | |||
| Trainer | Pokémon | Level | |
|---|---|---|---|
Team Cipher Grunt |
84 | ||
| 84 | |||
| 85 | |||
| Rewards: | |||
| Trainer | Pokémon | Level | |
|---|---|---|---|
Team Cipher Grunt |
85 | ||
| 85 | |||
| Rewards: | |||
Magma/Aqua Antagonist Playthrough
Walkthrough
Contents:
At last, the final objective for the protagonist's journey in the Aroma Region is almost within reach. The player needs to fight their way through the Grunts in the first two rooms before meeting up with Greevil about halfway into the third and final room. The ally will warn the player about the possibility of needing to face 3 battles in a row, which the player would do well to use that opportunity to heal up if needed. If the player is ready, the final battle(s) will commence.
When the player walks further down into the Cabinet, Suzerain (who is now clearly established as King Suzerain) is being guarded by Maxie/Archie. It is revealed that the player will have no chance getting to the King first as they are being guarded by the antagonist. The antagonist will then battle the player.
Upon the player emerging from the battle as the victor, Archie/Maxie is furious. He still seems determined to protect the King despite his loss. However, King Suzerain calls him off and talks to the player, declaring his disappointment. The battle between the player and King Suzerain begins again, this time with far more knowledge and far greater stakes.
After the King has been defeated, Archie/Maxie storms ahead to protect him again. However, King Suzerain calls him off, as the battle is over. Greevil proceeds to walk forward and begins the Black Orb ritual. Before the player can see it and the King becomes corrupted, it is implied that Archie/Maxie is killed by the pair as the screen fades to black. Text appears that explains the following events as the screen slowly fades out: Greevil rules from behind the throne. However, the player remarks on the darkness and questions what is happening and if it's all over.
The player then reappears in what the Save Menu will reveal to be the Black Orb with their entire party healed. As the player begins to proceed down the dark corridor, several text boxes will appear, presumably spoken from an enemy that cannot be seen. As the protagonist continues, it is made apparent that this enemy is not a stranger at all and instead feels very familiar. At last once the text boxes stop appearing and the enemy is brought into full view, the player is able to realize that the person behind all of the dark schemes in the Aroma Region was none other than the Demon Spirit of Zeus/Odin himself. Unsurprisingly, he challenges the player to a final battle in one last attempt to exact his revenge upon them.
The aftermath of this battle reveals that Zeus/Odin can no longer even bring himself to hate the player and instead appears to finally be able to find peace. The player will then be transported out of the Black Orb to the front of the Kingdom Cabinet in Kingdom City. The player will receive a call from Greevil, who asks them to return to the king's room in the Cabinet to receive the Crest of Aroma.
With this the Aroma storyline finally draws to a close, but the game's storyline has still not yet ended. To unlock the final piece of the storyline the player should start by collecting all of the missed Shadow Pokémon whose locations can be found at the top of the Ladoga Town lighthouse.
Obtainable Items
| Item | Location |
|---|---|
| Obtained in the leftmost room within Room 2 after defeating the final boss | |
| Obtained in the second leftmost room within Room 2 after defeating the final boss | |
| Obtained in the middle room within Room 2 after defeating the final boss | |
| Obtained in the second rightmost room within Room 2 after defeating the final boss | |
| Crest of Aroma | Obtained from Greevil after defeating the final boss |
Boss Battles
Magma Boss Maxie/Aqua Boss Archie
Contents:

Maxie

Archie
| Pokémon | Level | Moves | Item | |||
|---|---|---|---|---|---|---|
| 92 | Dragon Pulse | Perish Song | Moonblast | Sky Attack | None | |
| 89 | Shadow Sword | Shadow Wrath | Shadow Crush | Shadow Hold | None | |
| 92 | Swords Dance | Sandstorm | Drill Run | Fissure | None | |
| 94 | Heavy Slam | Earthquake | Hammer Arm | Focus Punch | Golurkite | |
| 93 | Bounce | Super Fang | Facade | Earthquake | None | |
| 94 | Fury Cutter | Night Slash | Razor Shell | Cross Chop | None | |
| Reward: | ||||||
King Suzerain
Contents:

| Pokémon | Level | Moves | Item | |||
|---|---|---|---|---|---|---|
| 93 | Spore my dick | Power Shrine | Special Shrine | Stealth Rock | ||
| 94 | Swords Dance | Sucker Punch | Seed Bomb | Drain Punch | Cacturnite | |
| 90 | Shadow Half | Shadow Sky | Shadow Crush | Shadow Down | None | |
| 90 | Shadow Fire | Shadow Half | Shadow Sky | Shadow Down | None | |
| 90 | Shadow Crush | Shadow Half | Shadow Sky | Shadow Down | None | |
| 94 | Swords Dance | Sacred Sword | Shadow Sneak | King's Shield | Weakness Policy | |
| Reward: | ||||||
Demon Spirit
Contents:
Demon Spirit Zeus (Omicron)
| Pokémon | Level | Moves | Item | |||
|---|---|---|---|---|---|---|
| 90 | Shadow Wave | Shadow Sky | Shadow Down | Shadow Half | None | |
| 95 | Meteor Mash | Pursuit | Earthquake | Hammer Arm | ||
| 95 | Hydro Pump | Volt Switch | Wildfire | Thunder Wave | ||
| 94 | Baton Pass | Substitute | Protect | X-Scissor | ||
| 95 | Sucker Punch | Low Kick | Swords Dance | Iron Head | Bisharpite | |
| 95 | Swords Dance | Sacred Sword | Shadow Sneak | King's Shield | ||
| Reward: | ||||||
Demon Spirit Odin (Zeta)
| Pokémon | Level | Moves | Item | |||
|---|---|---|---|---|---|---|
| 90 | Shadow Wave | Shadow Sky | Shadow Down | Shadow Half | None | |
| 95 | Earthquake | Hammer Arm | Pursuit | Meteor Mash | ||
| 95 | Volt Switch | Hydro Pump | Thunder Wave | Wildfire | ||
| 95 | Sucker Punch | Low Kick | Swords Dance | Iron Head | Bisharpite | |
| 95 | Swords Dance | Sacred Sword | Shadow Sneak | King's Shield | ||
| 94 | Baton Pass | Subtitute | Protect | X Scissor | ||
| Reward: | ||||||
Grunts
Room 1
Contents:
| Trainer | Pokémon | Level | |
|---|---|---|---|
Team Magma/Aqua Grunt |
86 | ||
| Rewards: | |||
| Trainer | Pokémon | Level | |
|---|---|---|---|
Team Magma/Aqua Grunt |
85 | ||
| 85 | |||
| 86 | |||
| Rewards: | |||
| Trainer | Pokémon | Level | |
|---|---|---|---|
Team Magma/Aqua Grunt |
85 | ||
| 86 | |||
| Rewards: | |||
| Trainer | Pokémon | Level | |
|---|---|---|---|
Team Magma/Aqua Grunt |
86 | ||
| Rewards: | |||
Room 2
Contents:
| Trainer | Pokémon | Level | |
|---|---|---|---|
Team Magma/Aqua Grunt |
86 | ||
| 86 | |||
| 82 | |||
| 85 | |||
| Rewards: | |||
| Trainer | Pokémon | Level | |
|---|---|---|---|
Team Magma/Aqua Grunt |
85 | ||
| 86 | |||
| Rewards: | |||
| Trainer | Pokémon | Level | |
|---|---|---|---|
Team Magma/Aqua Grunt |
86 | ||
| Rewards: | |||
| Trainer | Pokémon | Level | |
|---|---|---|---|
Team Magma/Aqua Grunt |
86 | ||
| 86 | |||
| 86 | |||
| Rewards: | |||
| Trainer | Pokémon | Level | |
|---|---|---|---|
Team Magma/Aqua Grunt |
86 | ||
| 86 | |||
| Rewards: | |||
| Trainer | Pokémon | Level | |
|---|---|---|---|
Team Magma/Aqua Grunt |
86 | ||
| 86 | |||
| Rewards: | |||